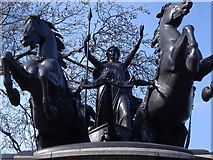
Boadicea's (or Boudicca's) Chariot by Westminster Bridge
© Copyright Gill Hicks and
licensed for reuse under this Creative Commons Licence.
Last week, we took an initial look at the Graphics settings in the Preferences dialogue in an effort to improve our frames per second (FPS) performance. This week, I was planning to take a closer look at all the options on that page, but, due to a combination of jury duty, flu in the family (not I, thankfully!), excitement at winning a chariot race, and plain old forgetfulness, I'll just have to make it short, and touch on a couple of things.
If you open the Preferences window, and select the Graphics tab, next to the the 'Quality and Performance' slider mentioned last week, there is a box labeled 'Custom'. If you select this, a score of controls will spring into view. Some of these may be greyed out, depending upon the Quality and Performance setting and the capabilities of your graphics card.
There is also a 'Recommended Settings' button at the bottom of the window, which will reset the settings to a consistent starting point, and unselect the Custom box at the same time. This is seldom the optimum result, but does provide a way to quickly get back to a known state while experimenting with settings.
If, after opening the Custom controls, you move the Quality and Performance slider, you will find that it is actually adjusting each of these controls. Play around a bit, and observe how the settings change, what their visual effect is, and what their impact on FPS is (Ctrl-Shift-1, remember). Then push the Recommended Settings button again, and re-select Custom.
While I have found all of these settings have some effect, some have more than others. Finding the optimum setting is a matter of trading off performance you can live with for visual quality you are happy with, and these values may change depending on the region you are in, and what you are doing. For instance, when I am chariot racing or in a sailing regatta (did I mention I'm the champion of the Minoan Empire in both sports?), I will set every thing to the absolute lowest setting, because I value performance above every thing else. For most purposes, though, I run at High Quality, with several of the other controls tweaked a bit.
I will wrap this up for now by noting that 'Draw Distanc'e is one of the most powerful controls if you are in a region with a large number of prims, avatars, and/or textures. If you are in a very empty area, it will not make as much difference. I have also found that the 'Water Reflections' and 'Atmospheric Shaders' selections under 'Shaders' can have a big effect.
Until next week!


No comments:
Post a Comment